| Method: |
| |
 |
 |
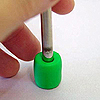
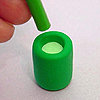
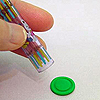
1.
Roll green clay into a cylinder, flatten top and bottom
then open middle as shown to make paint can. |
| |
 |
 |
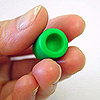
2.
Fill the paint can with light green colored clay then
flatten with Makin's Mallet. |
| |
|
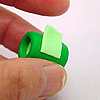 |
3.
Roll
a thin piece of clay and cut into a rectangle for the
paint can label. |
| |
 |
 |
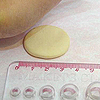
4.
Roll a small ball of clay and flatten to form lid. Add
details on the can and lid with appropriate tools. Repeat
steps 1 to 4 to make five more paint cans. |
| |
|
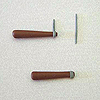 |
5.
Roll brown clay as shown to form brush handle. Wrap a
thin strip of clay on the thinner side of the handle.
Push a thin wire into the clay with a small bit poking
out the thin end to attach the brush head. |
| |
 |
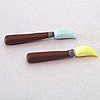 |
6.
Roll clay into a small teardrop shape and bend it to look
like a brush head. Texture with Makin's Mallet and attach
to wire on the brush handle. |
 |
 |
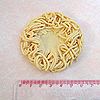 |
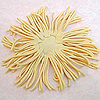
7.
Flatten a ball of light brown colored clay for the nest
base. Extrude the clay with Makin's Clay Gun Extruder
and arrange in the shape of a nest as shown in diagram. |
| |
|
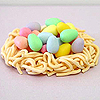 |
8.
Roll different colored clays into eggs and place into
the nest until it looks full. |
| |
|
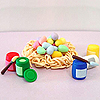 |
9.
Place paint cans and brushes next to the nest of eggs. |
| |
| Designed
by - Dorothy Chan, MAKIN'S CLAY® Design Team
|
