| Method: |
| |
 |
 |
1.
Roll neon orange clay into an oval and texture with Makin's
Mallet and clay pusher. Place a toothpick horizontally
in the middle to create space for the thread later on. |
| |
 |
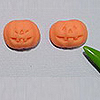 |
2.
Use
Makin's Mallet to indent the facial features onto the
pumpkin as shown. Fill in the eyes and nose with triangles
of black clay. |
| |
 |
 |
3.
Roll
green clay into a leaf shape then texture with Makin's
Mallet. Attach all pieces together.
|
| |
|
 |
4.
Roll
neon orange clay into disks and sandwich the toothpick
between the disk and pumpkin as shown. |
 |
 |
 |
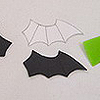
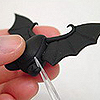
5.
Using
the pattern given cut out the wing of the bat with black
clay. Roll black clay into shape and stick it onto the
wing as shown
|
 |
 |
 |
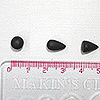
6.
Roll
black clay into a teardrop for the leg. Bend as shown
then cut the thinner end with scissors. Shape as shown
in the diagram.
|
| |
 |
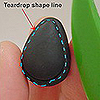 |
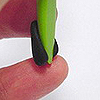
7.
Make
the body of the bat by rolling black clay into a teardrop.
Indent around the edge with a cap or a tube as shown. |
| |
|
 |
8.
Attach the wings and legs in place. Smooth over the contact
edges with a clay pusher.
|
| |
|
 |
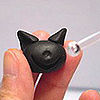
9.
Roll
black clay into a ball then indent the mouth as shown.
|
 |
 |
 |
10.
For
the ears, roll black clay into a triangle then shape as
shown with Makin's Mallet. Stick the ears in place and
smooth the seams with a clay pusher.
|
 |
 |
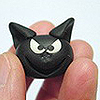 |
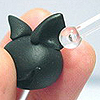
11.
Indent
a small hole for the nose on the head. Roll glow-in-the-dark
clay into a sheet then cut out a heart. Use the side of
the hearts as eyes as shown in the diagram. Add on a small
black ball for the nose.
|
 |
 |
 |
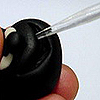
12.
Create
a hole for the mouth then attach the fangs then insert
the hook into the head.
|
 |
 |
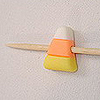 |
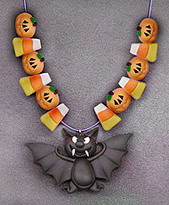
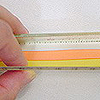
13.
For
the Halloween Candies roll white, neon orange and yellow
clay into logs. Put them together and flatten to form
flat surfaces. Cut into trapeziums and smooth edges. Puncture
holes into candy with a toothpick. |
| |
|
 |
14.
Chain together with a thread.
|
| |
| Designed
by - Dorothy Chan, MAKIN'S CLAY® Design Team
|